Three terms get used almost interchangeably in Smart Money Concepts, and they should not be: the fair value gap, the order block, and the liquidity void. They often appear in the same place on a chart, which is exactly why traders confuse them. But each one describes something different about the same impulsive move, and knowing which is which changes where you enter, where your stop goes, and how confident you should be.
This guide is a side-by-side comparison. It does not re-teach any one concept from scratch — for that, see the full Fair Value Gap explainer and the guide to order blocks. Here the goal is the distinction: what separates an FVG from an order block from a liquidity void, and how the three stack together into a single high-conviction zone.
The One-Sentence Version
Before the detail, here is the quick mental model:
- An order block is the cause — the last opposing candle where institutions loaded their position before the move.
- A fair value gap is the evidence — the three-candle imbalance the move left behind as it ran.
- A liquidity void is the scale — the wider, thinly traded stretch of price the impulse covered in one push.
The order block is where smart money entered. The FVG and the liquidity void are footprints of how fast they left. Get that hierarchy and the rest falls into place.
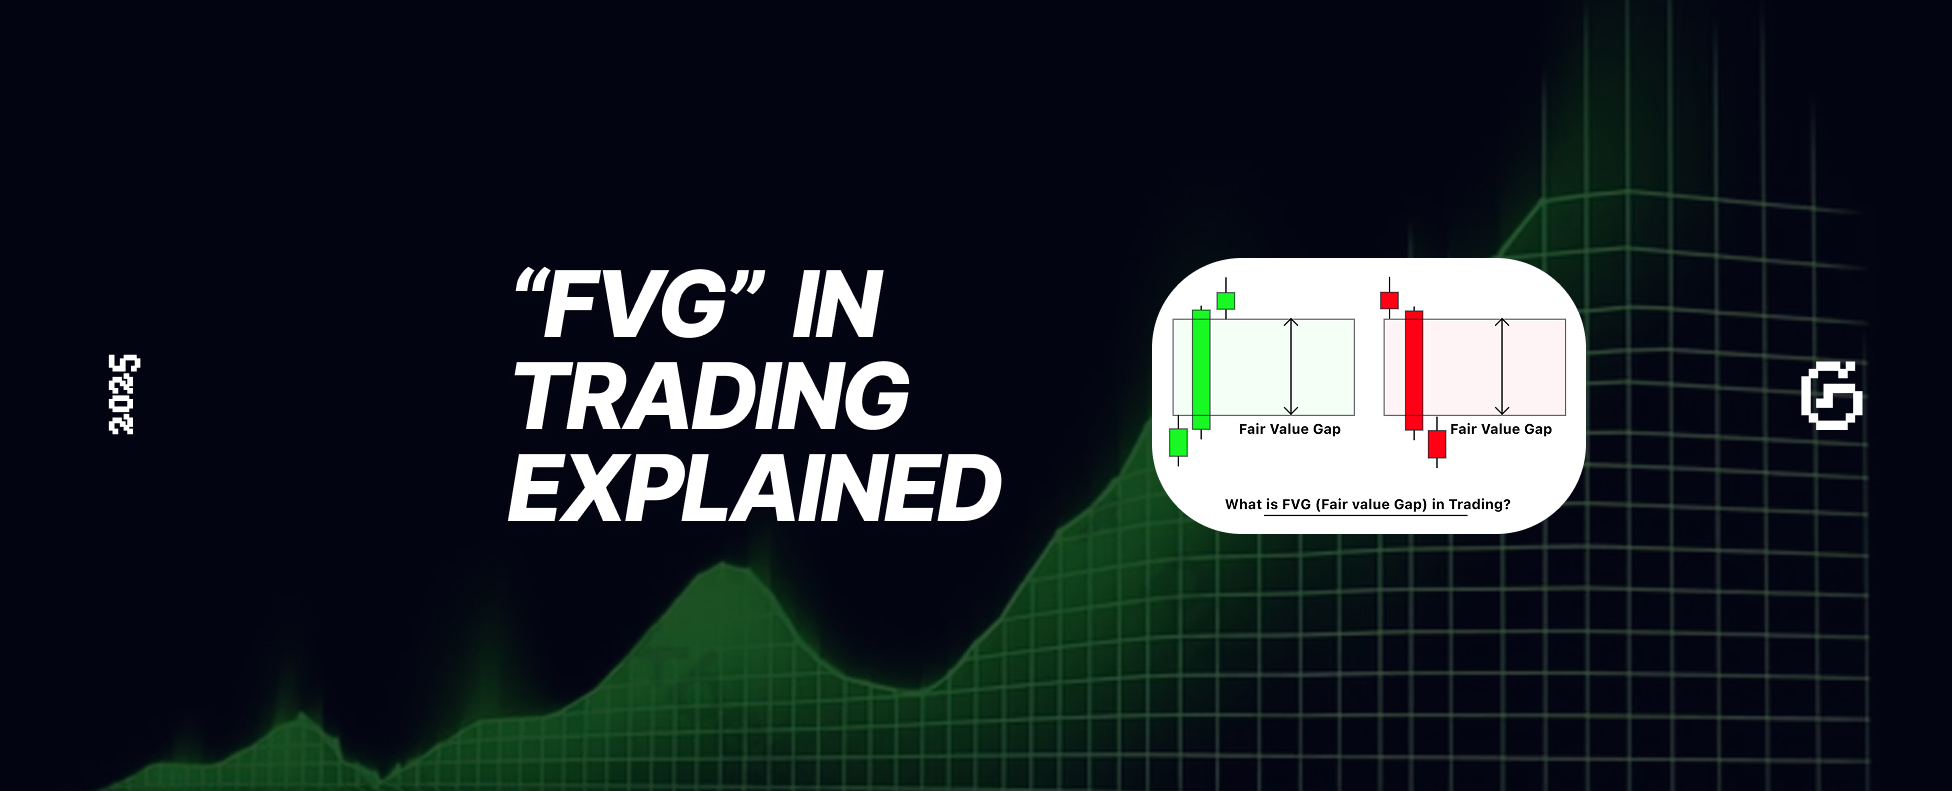
Fair Value Gap: The Three-Candle Imbalance
A fair value gap is a precise, mechanical pattern. It needs exactly three candles: a candle before the impulse, the impulsive candle itself, and the candle after. For a bullish FVG, the gap is the space between the high of candle 1 and the low of candle 3 — a range price skipped because the move was too fast for opposing orders to fill.
The defining trait of an FVG is that it is measurable and rule-based — you can point to two specific candle wicks and name the gap exactly. It is small, precise, and tradable on its own. For the entry mechanics, the step-by-step FVG strategy covers it in full.
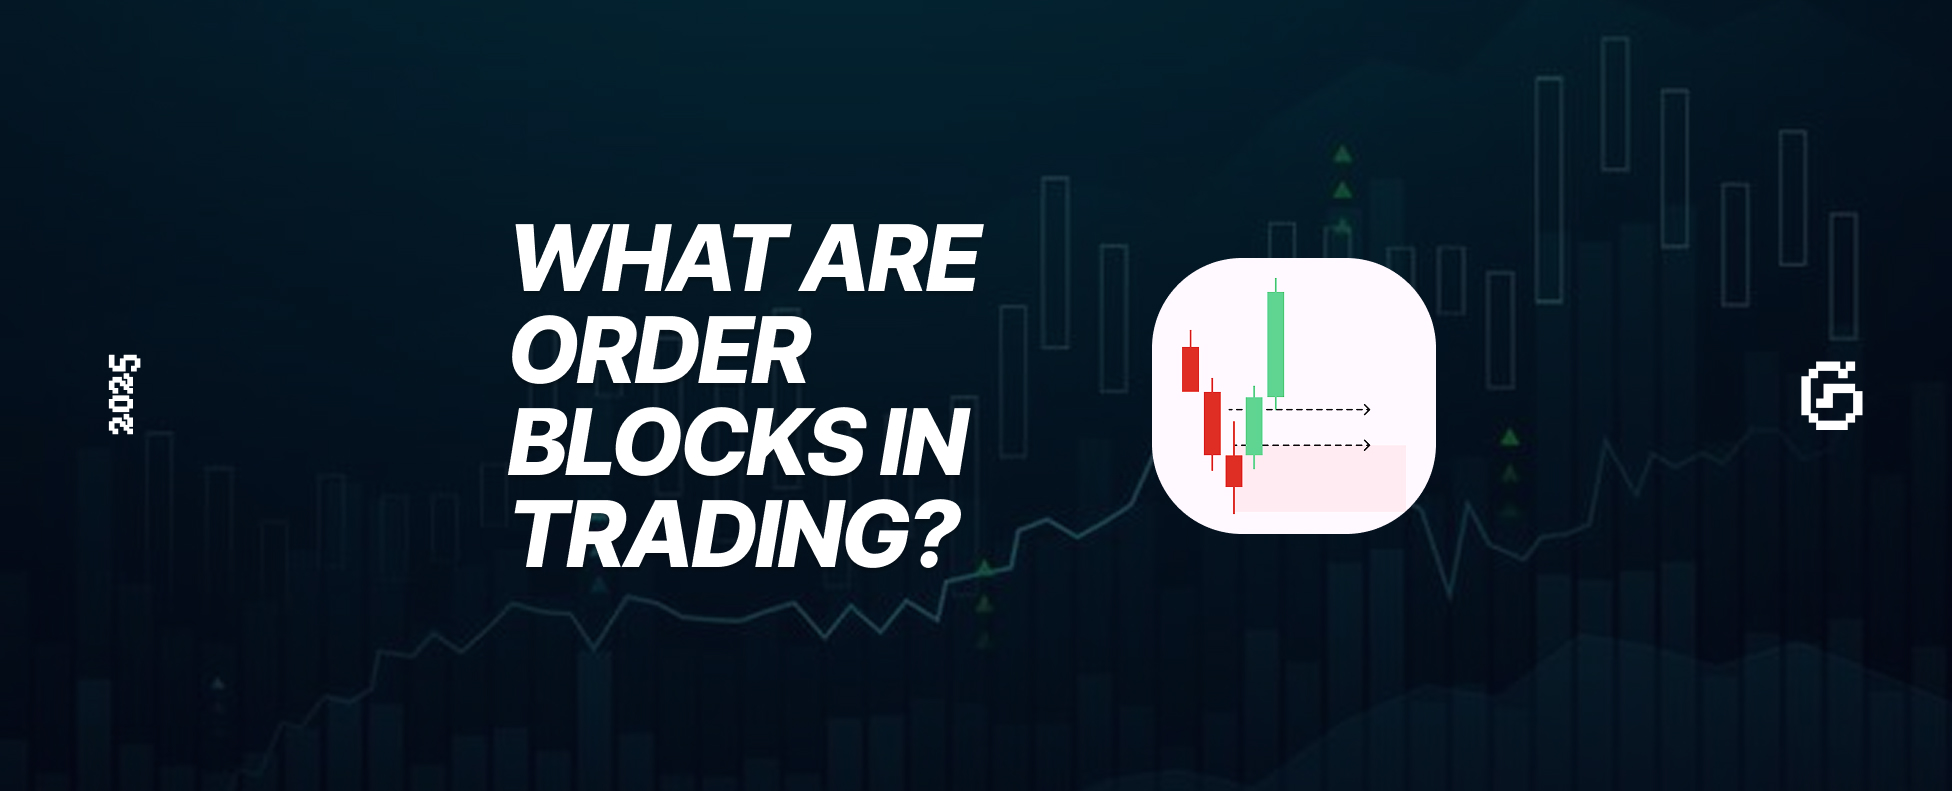
Order Block: The Last Opposing Candle
An order block is not an imbalance — it is a candle, or a tight cluster of candles, that marks where the institutional order sat. In a bullish setup it is typically the last down candle before the up move; in a bearish setup, the last up candle before the drop.
The logic is different from an FVG. The FVG says "price moved too fast here." The order block says "this is the origin of that move — the price level institutions defended before launching." When price returns to an order block, the idea is that unfilled institutional orders may still be resting there, so the zone can act as support or resistance.
Two practical differences from an FVG: an order block is defined by the opposing candle's body, not by a gap between non-adjacent wicks; and it is the origin of a move rather than something inside it, so it usually sits below a bullish FVG, not on top of it.
Liquidity Void: The Wide, Thin Run
A liquidity void is the broadest of the three. It is a large section of price that the market ran through in one aggressive push with very little two-sided trading — long, near-empty candles, often back to back. Where an FVG is a tight three-candle gap, a liquidity void can span a much wider range and contain several smaller imbalances inside it.
Think of the void as the whole "fast" zone and the FVG as the most precise pocket within it. Every clean FVG sits inside some imbalance; not every void produces a textbook three-candle FVG. The void tells you the move was thin and likely to be rebalanced; the FVG tells you exactly where to act when it is. The void is the region, the FVG the precise level inside it.
Side-by-Side: FVG vs Order Block vs Liquidity Void
| Fair Value Gap | Order Block | Liquidity Void | |
|---|---|---|---|
| What it is | A 3-candle price imbalance | The last opposing candle before the move | A wide, thinly traded run of price |
| What it represents | Inefficiency inside the impulse | The origin / cause of the impulse | The scale of the impulse |
| How it's defined | Gap between candle 1 high and candle 3 low (bullish) | Body of the last down/up candle before the move | A large range covered by long one-sided candles |
| Size | Small and precise | Small (one candle / tight cluster) | Large and broad |
| Where it sits | Inside the move | At the base of the move | Spans most of the move |
| Primary use | Precise entry zone | Deeper support/resistance, stop reference | Context — confirms a thin, revisit-prone move |
Read across one row at a time and the relationship is clear: same impulse, three different lenses. The order block anchors the bottom, the FVG marks a precise pocket inside, and the void describes how much ground the whole move covered.
How They Stack: A Worked Example
Concepts are easier to separate on a real sequence. This is an illustrative bullish setup on EUR/USD — the levels are for demonstration, not a live call.
Say EUR/USD has been consolidating in the London session. Then this prints, bottom to top:
- The order block. A final down candle forms with a body from 1.0800 down to 1.0790, closing weak. This is the last opposing candle before buyers take over — your order block zone is roughly 1.0790–1.0800.
- The impulse and the liquidity void. Price reverses hard and rips from about 1.0800 up to 1.0860 in a handful of long green candles with almost no pullback. That 60-pip thin run is the liquidity void — the whole "fast" zone.
- The fair value gap inside it. Within that impulse, a clean three-candle gap appears: candle 1's high is 1.0815, candle 3's low is 1.0835. The space between — 1.0815 to 1.0835, a 20-pip bullish FVG — is the precise, rule-defined pocket sitting inside the wider void.
So at a glance you can name all three: order block at the base (1.0790–1.0800), liquidity void across the run (1.0800–1.0860), and the FVG as a tight pocket inside it (1.0815–1.0835).
Now the confluence read. Price tops out, then retraces into the void to rebalance. You do not chase the impulse — you wait. Price drops back into the FVG at 1.0835 and prints a bullish reaction. Here the three concepts each do a job:
- The FVG gives you the precise entry — 1.0835, the near edge of the gap.
- The order block gives you the deeper invalidation — your stop goes just below it, at 1.0785, because if price trades clean through the origin of the move, the thesis is dead.
- The liquidity void gives you conviction — the whole stretch was thin, so a revisit and rebalance was expected, not a surprise.
The trade:
| Parameter | Value |
|---|---|
| Direction | Long |
| Entry (FVG near edge) | 1.0835 |
| Stop (below order block) | 1.0785 |
| Risk (stop distance) | 50 pips |
| Target (prior swing high) | 1.0910 |
| Reward (target distance) | 75 pips |
| Risk-to-reward | 1:1.5 |
The arithmetic: risk is 1.0835 − 1.0785 = 0.0050 = 50 pips; reward is 1.0910 − 1.0835 = 0.0075 = 75 pips; that is a 1:1.5 risk-to-reward. You can pressure-test any setup like this with the risk-reward ratio calculator, and turn "risk 1%" into an exact lot size with the position size calculator.
Notice that no single concept carried the trade. The FVG alone gives a tight entry but a shallow stop; the order block alone gives a solid invalidation but a vague entry; the void alone is just context. Stacked, they produce an entry, a stop, and a reason — the entire point of treating them as separate tools.
Which One Do You Actually Trade?
A common question is whether you should enter at the order block or at the FVG. They are not competing — they answer different questions:
- Enter at the FVG when you want the tightest, most precise entry inside the move.
- Reference the order block when you want a deeper, structurally safer level — either as a fallback entry if price runs past the FVG, or as your stop's anchor.
- Use the liquidity void as the filter: if the impulse was thin and one-sided, a rebalance into the FVG or order block is far more likely than if the move was a slow grind.
The strongest setups are the ones where all three line up, as in the example above. When the FVG sits just above an order block, and both sit inside an obvious liquidity void, you are not guessing — you have the cause, the evidence, and the scale of the move all pointing at the same zone.
Common Mistakes Separating the Three
- Calling every gap an order block. A gap between wicks is an FVG. An order block is a candle — the last opposing one before the move. They are not the same object.
- Treating the FVG and the void as identical. The void is the region; the FVG is the precise pocket inside it. Trading "the whole void" means a vague entry and a wide stop.
- Ignoring the order block for your stop. The FVG gives a tight entry, but its far edge is often a shallow stop. The order block beneath usually gives a more honest invalidation level.
- Forcing all three when they are not there. Plenty of clean moves have an FVG but no obvious order block, or a void with no textbook three-candle gap. Take what the chart gives you; do not invent confluence that is not on the screen.
Tracking Which Confluence Actually Pays
The only way to know whether order-block-plus-FVG setups beat FVG-only setups for you is to measure them. Tag each trade in a trading journal with the confluence present — FVG only, FVG with order block, all three with a clear liquidity void — and the outcome.
After 50–100 tagged trades the data answers questions instinct cannot: whether stacking a confirmed order block under your FVG genuinely lifts your win rate, whether the thin-void filter matters as much as you think, and which combination you should be holding out for. That feedback loop is what turns three borrowed SMC terms into a measured, personal edge.
FAQ
What is the difference between an FVG and an order block?
A fair value gap is a three-candle price imbalance — the range price skipped during a fast move, measured between candle 1's high and candle 3's low (bullish). An order block is a candle, not a gap: the last opposing candle before the move began, marking where institutions likely entered. The FVG sits inside the impulse; the order block sits at its origin, usually below a bullish FVG. The FVG is best for a precise entry; the order block is a deeper support level and a natural stop reference.
Is a liquidity void the same as a fair value gap?
They overlap but are not identical. A liquidity void is a wide stretch of price the market ran through with little two-sided trading — long, one-sided candles in a row. A fair value gap is a specific, rule-defined three-candle pocket. Every clean FVG sits inside some imbalance, so an FVG is essentially the most precise part of a liquidity void. The void is the region; the FVG is the exact level within it.
Should I enter at the order block or the FVG?
It depends on what you want. The FVG gives the tightest, most precise entry inside the move. The order block gives a deeper, structurally safer level — useful as a fallback entry if price runs past the FVG, or as the anchor for your stop. The highest-conviction setups are the ones where the FVG sits just above an order block and both fall inside an obvious liquidity void, so you do not have to choose — you enter at the FVG and stop below the order block.
Do all three always appear together?
No. Many clean impulsive moves leave a fair value gap without an obvious order block, or cover a liquidity void without printing a textbook three-candle FVG. When all three do align at the same price, the setup is stronger because you have the cause, the evidence, and the scale agreeing — but you should never invent confluence that is not actually on the chart.
About the author. Artem Gasparyan is the founder of GASPNTRADER, a free trading journal built to help traders track Smart Money setups — order blocks, fair value gaps, and liquidity voids — and turn them into a measured edge. This article reflects common Smart Money Concepts practice and is educational, not financial advice.