If you’ve ever heard traders mention “order blocks” or “smart money concepts” (SMC), you might’ve wondered what these terms really mean.
In simple terms, order blocks represent zones on the chart where institutional traders — like banks or hedge funds — placed large buy or sell orders.
Understanding them gives you a huge edge: it’s like knowing where big money entered the market.
In this article, we’ll break down what order blocks in trading are, how to identify a valid order block, and how you can use this concept inside your trading journal with GASPNTRADER.
What Are Order Blocks in Trading?
Order blocks are price zones created by institutional buying or selling activity.
They often occur right before strong impulsive moves — a rally or drop that shows where large participants committed their capital.
Order Block Definition
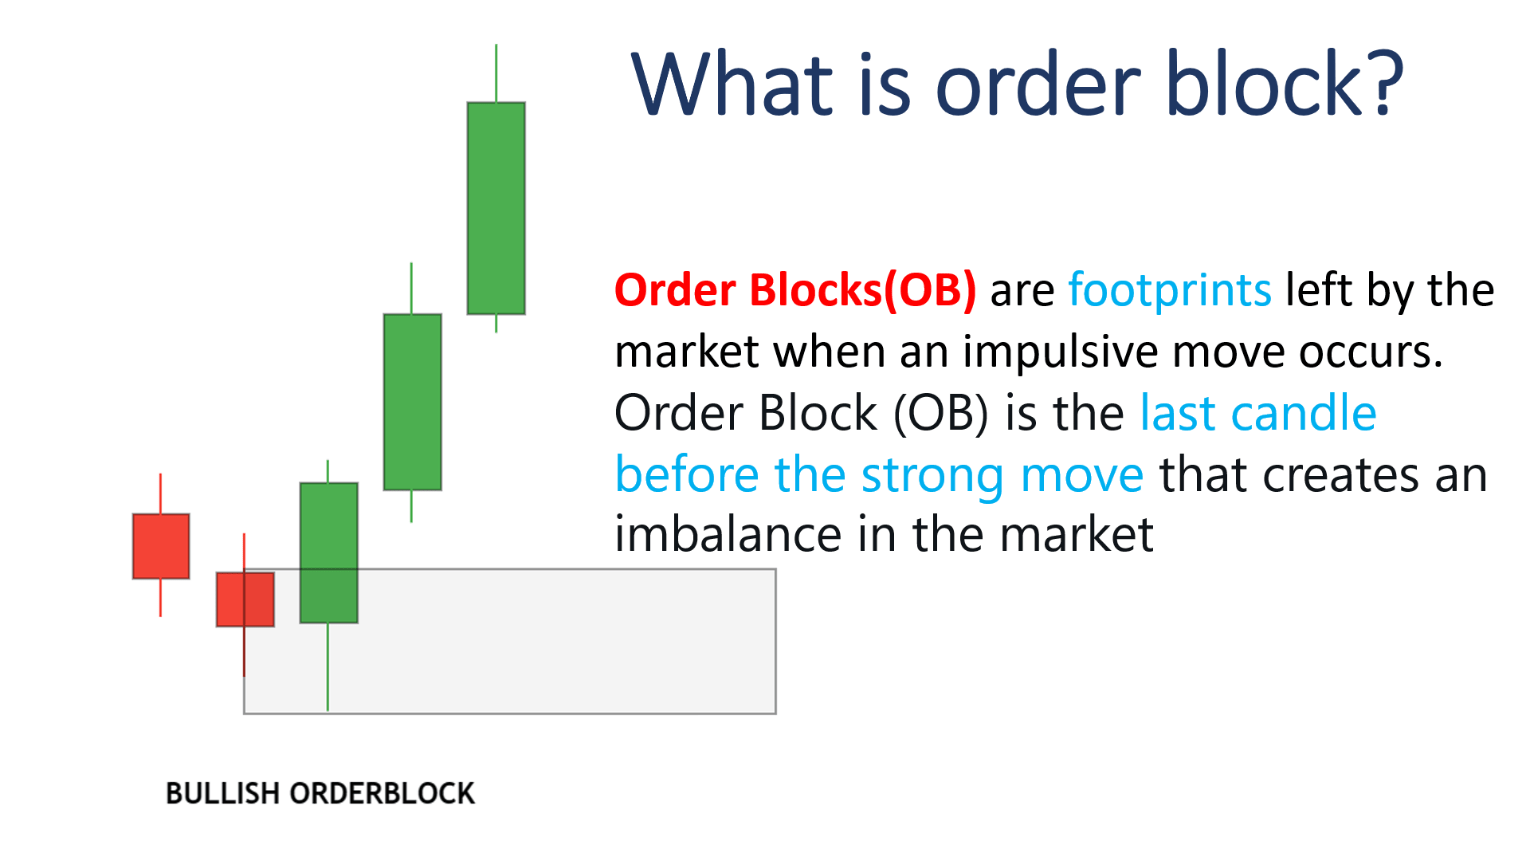
An order block is the last bullish or bearish candle before a strong price movement that breaks structure or creates a new trend.
It signals where smart money executed their orders, leaving behind an area of unfilled positions or liquidity.
In other words:
An order block marks where big traders entered, and price often returns to this level later for mitigation (retesting unfilled orders).
 What is Order Block

Why Order Blocks Matter
Order blocks are essential in Smart Money Concepts (SMC) and institutional trading models because they highlight key zones of interest for liquidity, reversals, and trend continuation.
Traders use order blocks to:
- Identify potential entry and exit zones.
- Anticipate price reversals or continuations.
- Align trades with institutional order flow instead of retail noise.
This makes order blocks one of the most powerful concepts in modern technical analysis.
What Is an Order Block in Forex?
In forex trading, order blocks are areas on a currency pair chart where banks and large institutions executed high-volume buy or sell orders.
For example:
- A bullish order block (demand zone) forms when institutions buy heavily before pushing price up.
- A bearish order block (supply zone) forms when they sell heavily before driving price down.
These zones often act as support or resistance when price returns — because the big players might still have pending orders to fill.

Types of Order Blocks in Trading
There are two main types of order blocks traders focus on:
1. Bullish Order Block
A bullish order block occurs when large buy orders cause an upward move.
Typically identified as the last down candle before a major bullish impulse.
Characteristics:
- Found before a strong bullish move.
- Acts as a demand zone.
- Traders look for entries near the open or 50% of the candle.
2. Bearish Order Block
A bearish order block forms when institutional sell orders push price downward.
Usually the last up candle before a sharp drop.
Characteristics:
- Found before a strong bearish move.
- Acts as a supply zone.
- Traders enter short positions on retests.
Order Blocks in Trading Explained with Example
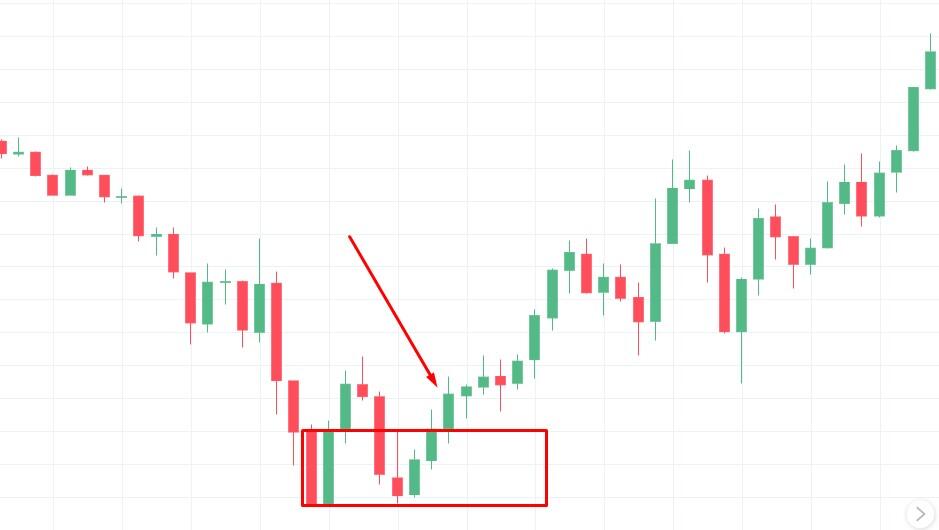
Let’s take a forex example to make this concrete.
In the chart above, price was in a clear downtrend, forming consecutive lower lows.
Inside the highlighted zone, you can see a final bearish candle before a strong bullish impulse — this marks the bullish order block.
That candle represents where institutional buyers entered the market, absorbing liquidity and initiating a reversal.
When price later retested this zone, it rejected strongly and continued upward, confirming the presence of smart money buying activity.
In simple terms: the last bearish candle before the impulsive bullish move becomes your bullish order block —
a key area where demand from big players shifted the trend direction.
This same logic applies across crypto, stocks, and commodities — anywhere supply and demand interact.
How to Identify a Valid Order Block
Not every last candle before a move is an order block. To find a valid order block, look for these confirmations:
1. Strong Break of Structure (BOS)
Price must break a previous high or low after the order block forms.
This shows genuine institutional intent.
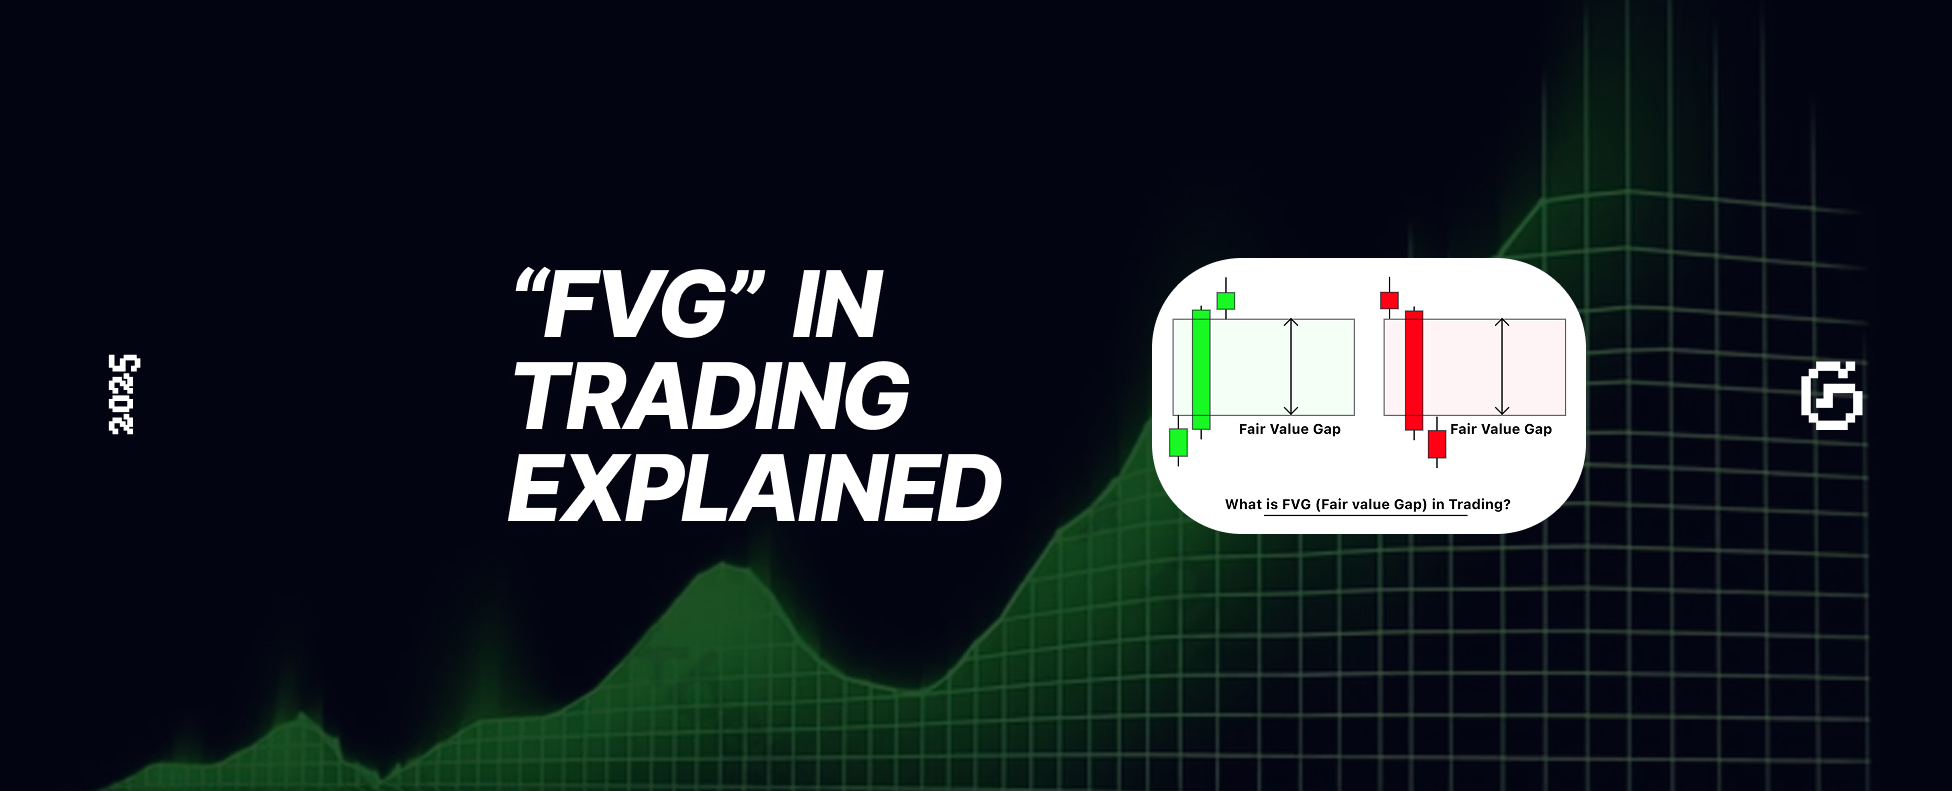
2. Imbalance or Fair Value Gap (FVG)
After the impulsive move, you’ll often see an imbalance — an area where price moved too quickly without much trading.
This confirms strong institutional activity.
3. Retest and Reaction
When price returns to the order block, look for clear rejection or reversal.
That’s a high-probability confirmation of a valid zone.
4. Timeframe Confluence
Higher timeframe (HTF) order blocks are more reliable.
For instance, an H4 order block has greater institutional weight than an M5 one.
How to Trade Order Blocks Effectively
Here’s a step-by-step framework for using order blocks in your trading plan:
Step 1. Identify Market Structure
Check whether the market is trending or ranging.
You want to trade order blocks in the direction of the main trend.
Step 2. Mark Potential Order Blocks
Find the last opposing candle before a strong move that breaks structure.
Step 3. Confirm with Volume and FVG
Check for strong volume spikes or fair value gaps confirming institutional orders.
Step 4. Wait for Price to Return
Don’t chase. Wait for price to come back to your zone.
Step 5. Look for Entry Triggers
On retest, look for:
- Reversal candlestick patterns (e.g. engulfing).
- Lower timeframe break of structure.
- Divergence in momentum indicators.
Step 6. Set Risk Parameters
Place stop loss below/above the order block and target a minimum 2:1 reward-to-risk ratio.

Bullish and Bearish Order Block Examples
| Type | Description | Market Behavior |
|---|---|---|
| Bullish Order Block | Last down candle before a strong bullish move | Acts as demand zone; price rallies after retest |
| Bearish Order Block | Last up candle before a strong bearish move | Acts as supply zone; price drops after retest |
Example:
- Bullish OB → Price drops to previous demand zone → Big rejection → Continuation up.
- Bearish OB → Price rallies into supply zone → Sharp rejection → New lower low forms.
 Bearish & Bullish Order Blocks

Common Mistakes When Using Order Blocks
-
Marking every candle as an OB.
Focus only on those preceding major structure breaks. -
Ignoring market context.
An order block inside a consolidation is often noise. -
Not waiting for confirmation.
Let price retest and react before entering. -
Forcing OBs across all timeframes.
Stick to one or two key timeframes (e.g., H4 + M15) for clarity.
Advanced Concepts: Mitigation and Liquidity
What Is Mitigation?
When price returns to an order block, institutions may close remaining positions or open new ones, mitigating their exposure.
That’s why OBs often lead to sharp rejections.
Liquidity and Stop Hunts
Institutions often drive price into liquidity pools (where retail stops are located) before returning to order blocks.
This is part of the smart money manipulation phase.
Order Blocks vs. Supply and Demand Zones
Many traders confuse order blocks with supply and demand zones — they are related but not identical.
| Aspect | Order Block | Supply/Demand Zone |
|---|---|---|
| Focus | Institutional orders | General imbalance of buyers/sellers |
| Candle Origin | Last opposite candle before impulse | Area where price previously reversed |
| Confirmation | Break of structure required | Often standalone |
| Precision | High | Medium |
Simply put:
Every order block is a supply/demand zone, but not every supply/demand zone is an order block.

Valid Order Block Checklist
Use this quick checklist before marking an area as valid:
- Clear impulsive move after formation
- Break of structure following the candle
- Fair Value Gap or imbalance visible
- Retest reaction upon return
- Ideally on higher timeframe
- Confluence with trend direction
If all are met — it’s likely a valid order block worth watching.
Integrating Order Block Analysis in GASPNTRADER
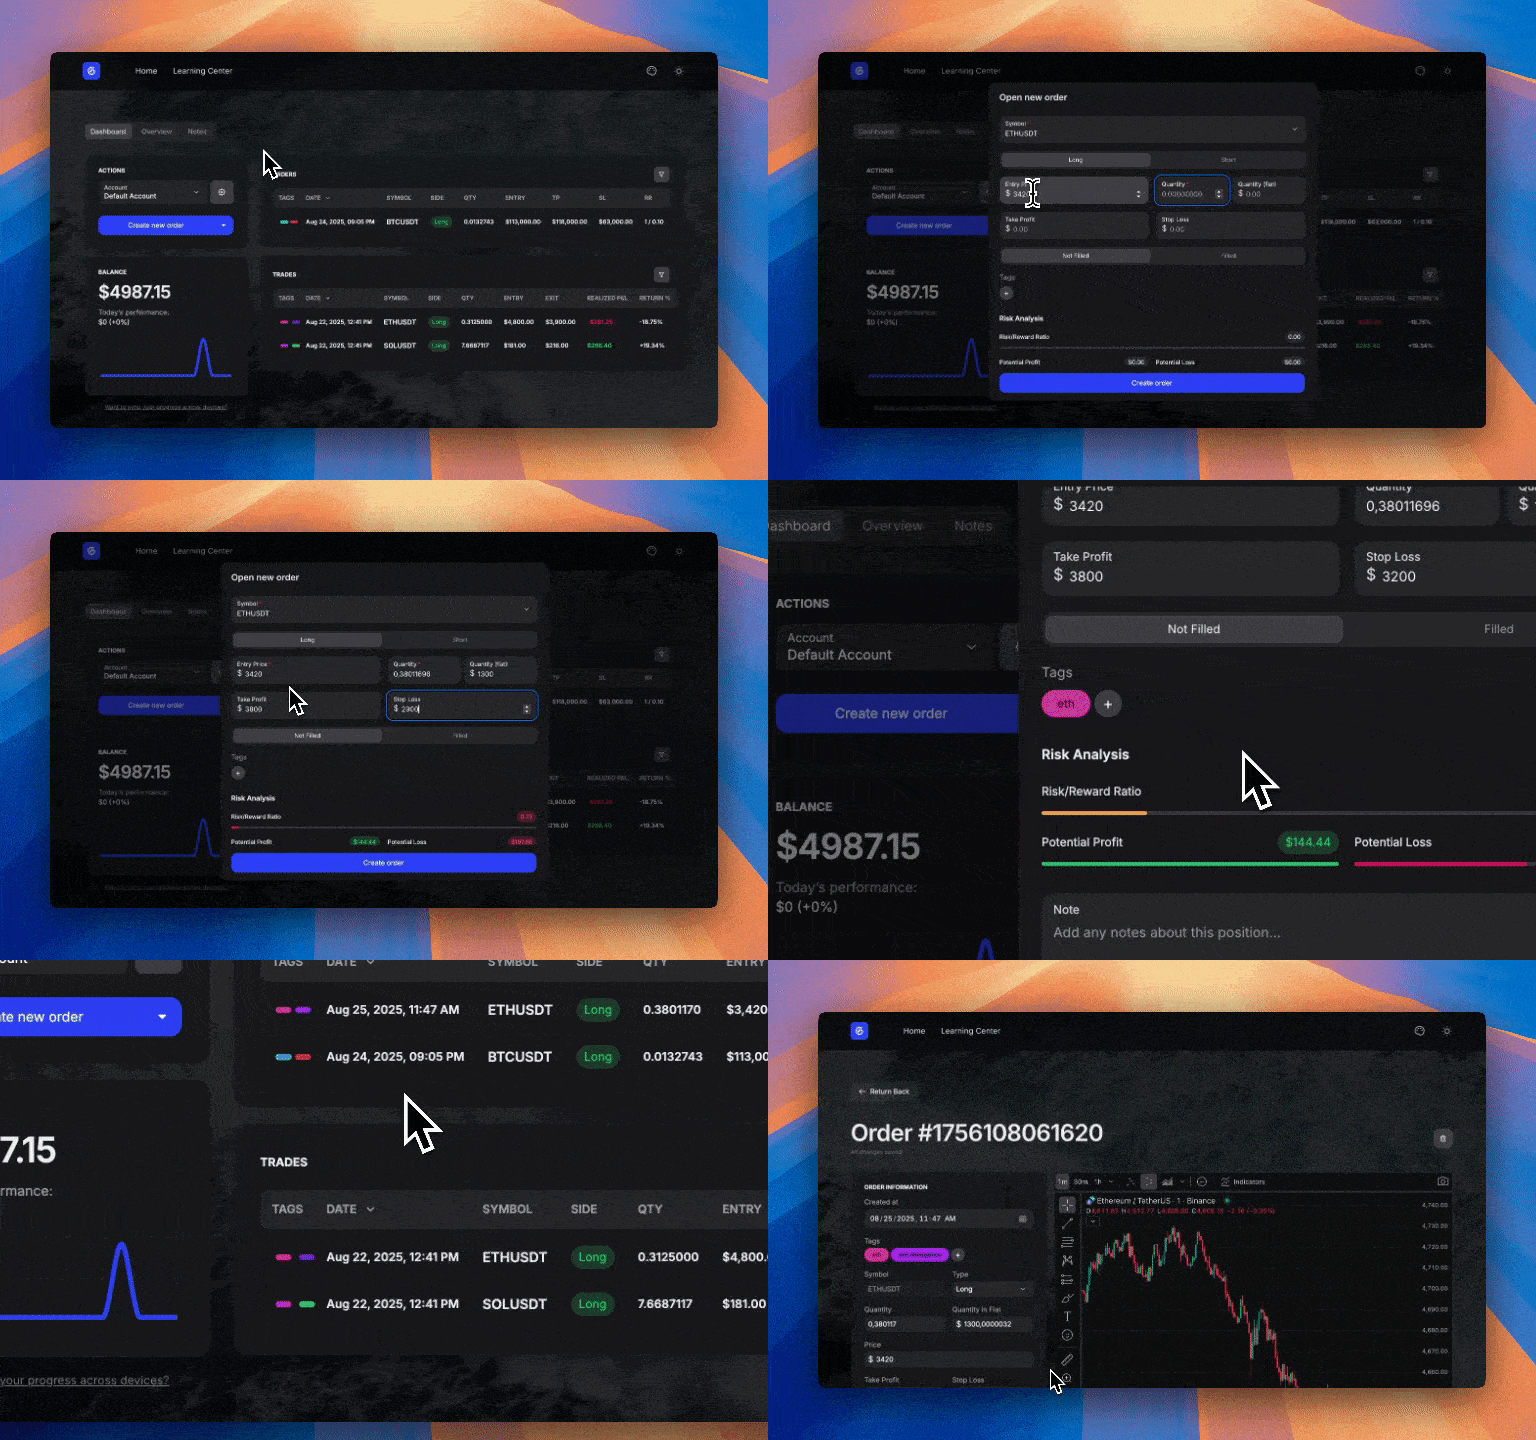
GASPNTRADER isn’t just a trading journal — it’s a tool to help you track patterns like order block reactions across your trades.
1. Tag and Label Order Block Trades
When you enter a trade based on an order block, tag it inside GASPNTRADER (e.g., “Bullish OB” or “Bearish OB”).
Over time, you’ll see which setups yield the best risk/reward ratios.
2. Track Success Rate by Setup
The analytics dashboard shows which order block setups perform better — enabling you to refine your strategy objectively.
3. Compare Performance Across Pairs and Timeframes
Easily filter performance data by asset class (forex, crypto, stocks) or timeframe (H1, H4, Daily).
4. Build a Consistent Edge
By combining order block tracking with execution data, you can optimize your trade timing and precision like institutional players.
Final Thoughts
Order blocks offer a powerful window into institutional behavior — the footprints of smart money.
Understanding what order blocks in trading are, and being able to identify a valid order block, allows you to trade in alignment with liquidity and real market intent.
But mastery takes time.
Start by identifying structure, marking clean examples, and journaling your trades in GASPNTRADER.
Soon, you’ll recognize recurring order block patterns — and use them to gain a clear, data-backed edge in the markets.
